
To make DIY Valentine’s Day bath bombs, gather your ingredients like baking soda, citric acid, Epsom salts, essential oils, food coloring, and molds. Carefully mix your dry and wet ingredients to achieve a crumbly but moist texture, then press the mixture firmly into molds. Add personal touches like dried petals or glitter. Let the bombs dry in a cool, well-ventilated space for at least 24 hours. Keep exploring for detailed steps to perfect your handmade bath bombs.
Key Takeaways
- Gather suitable ingredients like baking soda, citric acid, essential oils, food coloring, and molds to customize your bath bombs.
- Mix dry ingredients thoroughly, then gradually add wet components, aiming for a damp, crumbly consistency that holds when pressed.
- Choose flexible silicone molds or plastic shapes, pressing mixture firmly and chilling for added firmness and shape retention.
- Add personal touches such as dried petals, glitter, or small charms for a unique, festive appearance.
- Dry finished bath bombs in a well-ventilated area for at least 24 hours, avoiding sunlight and excessive handling.
silicone heart-shaped bath bomb molds
As an affiliate, we earn on qualifying purchases.
As an affiliate, we earn on qualifying purchases.
Gathering Your Supplies and Ingredients
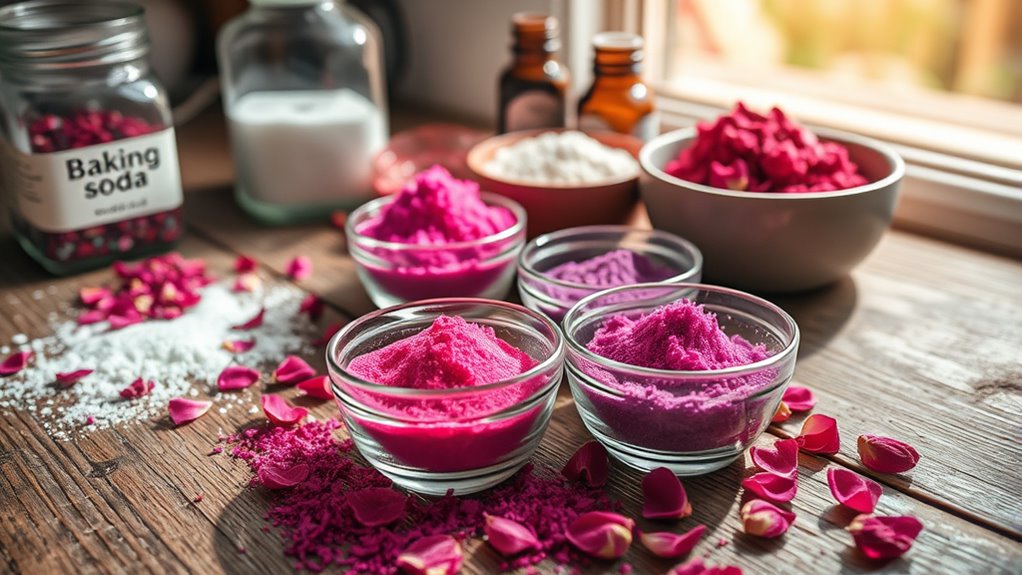
Before you start making your Valentine’s Day bath bombs, gather all the supplies and ingredients you’ll need. You’ll want baking soda and citric acid as your base, so pick up enough for your batch. Add Epsom salts for relaxation and cornstarch to help with fizzing. Don’t forget essential oils like lavender or rose for fragrance, and food coloring or mica powders for vibrant hues. You’ll also need a mixing bowl, a whisk, and molds—silicone or plastic heart-shaped ones work best. Keep a spray bottle of water handy to help bind the ingredients. Additionally, ensure proper safe handling practices when working with powders and essential oils to prevent any irritation or accidents. Using proper hydration during the process can also help maintain your skin’s health while working with these ingredients. Being aware of glycolic acid benefits can motivate you to incorporate exfoliating ingredients into your skincare routine to enhance your glow. Farmhouse-style decor ideas can inspire a cozy and charming atmosphere in your bathroom to complement your DIY projects. Preparing your workspace with hygienic practices ensures a clean and safe environment for creating your bath bombs. Having everything ready beforehand makes the process smoother and more enjoyable.
Choosing the Perfect Scents and Colors
Once you’ve gathered your supplies, it’s time to select the scents and colors that will make your bath bombs special. Think about your loved one’s preferences or create a relaxing, romantic vibe. Choose essential oils like lavender, rose, or vanilla for soothing aromas, but don’t overdo it—just a few drops will do. For colors, pick shades that match Valentine’s Day themes: reds, pinks, or even soft pastels. Food coloring works well and disperses evenly, but use sparingly to avoid staining. You can also add a touch of shimmer or glitter for a luxurious look. Keep in mind, brighter colors and stronger scents will be more noticeable in the bath, so balance your choices to create a delightful sensory experience. Additionally, incorporating essential oil blending ideas can inspire eco-friendly ways to enhance your bath bomb crafting process. Being mindful of industry trends can help you stay updated on popular scents and colors that resonate with your loved ones. For an extra touch, consider researching color psychology to choose hues that evoke specific feelings or moods, making your gift even more meaningful. To ensure your bath bombs are safe and effective, using high-quality, natural ingredients can enhance the overall experience and benefit your skin.
Mixing the Dry Ingredients
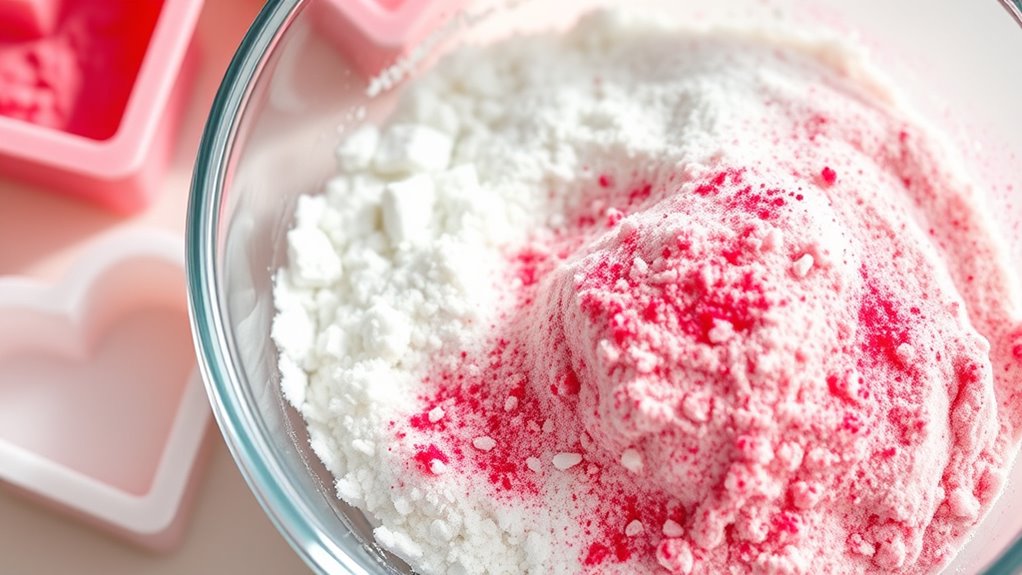
To guarantee your bath bombs hold together and fizz properly, start by thoroughly mixing your dry ingredients. This ensures even distribution of all components. First, sift the baking soda into a large bowl to break up clumps. Second, add the citric acid slowly, stirring constantly to prevent any clumps from forming. Third, incorporate the Epsom salts and stir well until uniform. Fourth, if using colorants or glitter, sprinkle them evenly and mix thoroughly. As you combine, use a whisk or your fingers to break up any lumps and make sure everything is evenly distributed. Proper mixing creates a consistent base, leading to a smooth, well-fizzing bath bomb. Additionally, ensuring your dry ingredients are well mixed can prevent issues with clogging and uneven finishes during the process. Incorporating uniform distribution of ingredients can also help avoid separation or uneven color when the bath bomb dissolves. For optimal results, consider proper storage techniques to maintain the integrity of your dry mixture until use. Incorporating essential oils into your dry mix can also enhance the aromatherapy benefits of your bath bombs, making your experience more relaxing. Taking the time to blend all dry ingredients evenly can also improve the overall appearance and performance of your bath bombs, making them more professional-looking and effective.
Combining the Wet Ingredients Carefully
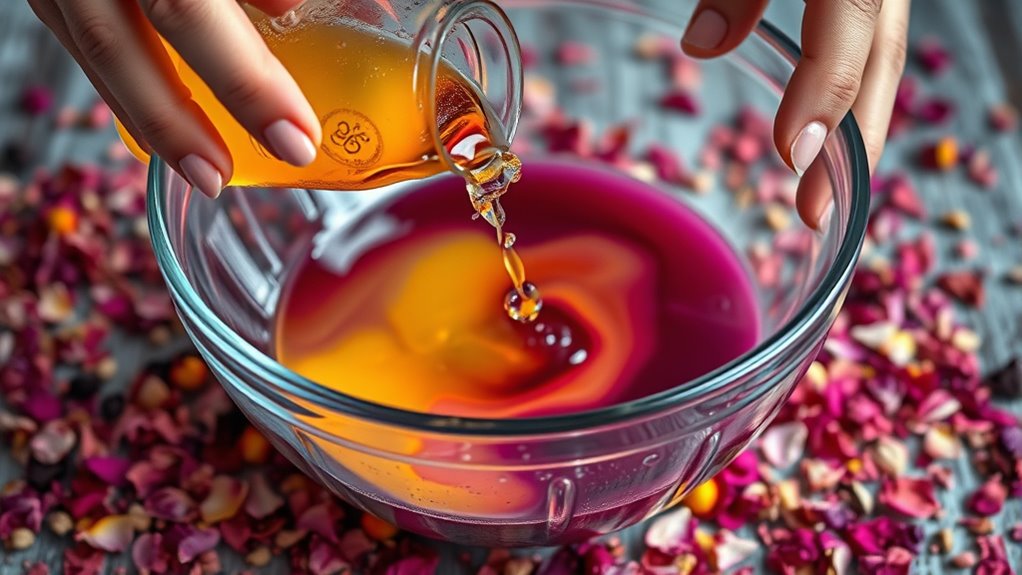
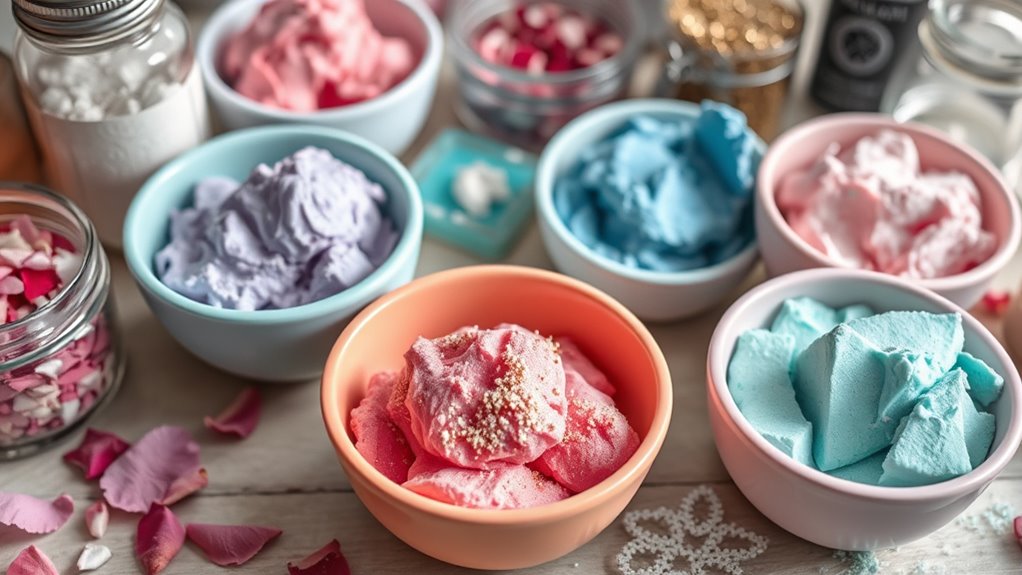
When combining the wet ingredients, it’s vital to do so carefully to guarantee your bath bombs hold together without activating prematurely. Start by slowly adding your liquid mixture to the dry ingredients, a little at a time, while continuously stirring. Use a spray bottle to lightly mist the mixture if it’s too dry, but avoid over-wetting. The goal is to achieve a slightly damp, crumbly texture that can hold together when pressed without fizzing immediately. Be gentle and patient, as rushing can cause the mixture to activate too soon. Mixing evenly ensures the color, fragrance, and oils distribute properly, giving your bath bombs a consistent appearance and scent. Take your time to combine everything thoroughly but carefully. Proper tuning techniques can help achieve the perfect consistency and performance in your bath bombs, especially when considering precise measurements for optimal results. Paying attention to ingredient ratios is also crucial to prevent premature activation and ensure the bath bombs set correctly. Additionally, understanding how moisture content impacts the mixture can help you better control the activation process during creation. Incorporating knowledge of entertainment and parks hours can also be helpful if you’re planning a relaxing bath after a day of visiting local attractions.
Achieving the Right Consistency
Achieving the right consistency is key to making bath bombs that hold their shape and fizz properly. To get there, focus on these steps: 1. *Add your dry ingredients gradually*, mixing well to prevent clumping. 2. *Spritz your mixture with a fine mist of witch hazel or rubbing alcohol*, stirring constantly until it just holds together. 3. *Test the consistency by squeezing a small amount in your hand*—it should hold shape without crumbling. 4. *Adjust with more moisture or dry ingredients* as needed, aiming for a damp, crumbly texture that sticks together when pressed. A proper consistency assures your bath bombs won’t crumble apart or be too soft. Keep testing and adjusting until your mixture feels just right for molding. Achieving optimal texture is essential for successful bath bomb creation.
Getting the perfect bath bomb consistency ensures they hold shape and fizz beautifully every time.
Additionally, understanding the best laundry detergents can help keep your bath bombs free of residues if you plan to store or gift them.
Molding and Shaping Your Bath Bombs
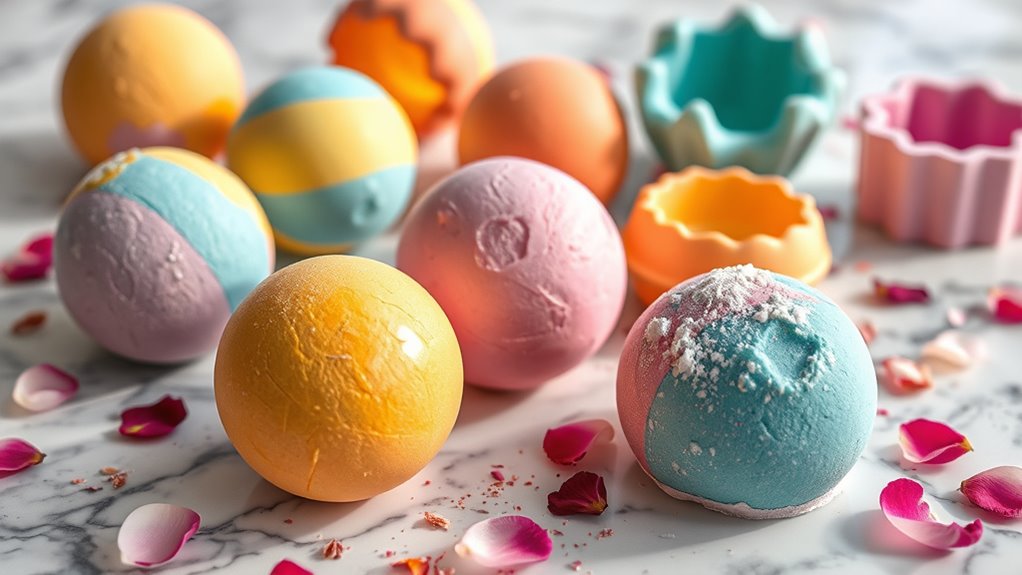
Choosing the right molds can make shaping your bath bombs easier and more fun. You can use silicone molds, plastic ornaments, or even DIY options to create unique shapes. To guarantee your bombs hold their form, press the mixture firmly and let them firm up in a cool, dry place. For added durability, consider using mold materials that are specifically designed for bath products. Selecting molds made from safe materials ensures your bath bombs are both beautiful and secure during use. Additionally, opting for durable mold options can help maintain their shape during storage and handling.
Choosing the Right Molds
Selecting the right molds is essential for shaping your bath bombs into the desired form and achieving a professional look. The mold determines your bath bomb’s size, shape, and overall appearance. Consider these options:
- Silicone molds – flexible, easy to unmold, and available in various shapes, perfect for intricate designs.
- Plastic spherical molds – classic round shape, ideal for traditional bath bombs.
- Silicone ice cube trays – versatile, allowing for small, fun shapes like hearts or stars.
- Custom molds – create personalized shapes that add a special touch for Valentine’s Day.
Choose molds that match your design vision and are easy to handle. Guarantee they are food-grade or safe for skin contact to avoid any issues during use.
Techniques for Shaping
Once you’ve picked the perfect molds, the next step is shaping your bath bombs with care. Begin by pressing your mixture firmly into each mold, ensuring there are no air pockets. If using a two-part mold, slightly overfill each side to compensate for shrinkage, then press together firmly to create a seamless shape. For more control, you can also shape the mixture by hand into balls or other forms before placing them in molds. Wrap your molds with a towel or press gently to compact the mixture further, which helps prevent crumbling later. Be patient and avoid rushing the process, as gentle handling guarantees your bath bombs hold their shape and look polished. Proper shaping creates professional-looking, ready-to-use bath bombs perfect for gifting or personal pampering. Additionally, proper shaping techniques help ensure your bath bombs will dissolve evenly in water and provide a better bathing experience.
Tips for Firming Up
To make certain your bath bombs hold their shape and look professional, it’s crucial to focus on firming up the mixture during molding and shaping. You want the mixture to be damp enough to hold together but not too wet. Here are some tips:
- Add a small amount of water gradually, mixing thoroughly until the mixture just sticks together.
- Use your hands to press firmly when molding, ensuring even pressure.
- For extra firmness, place the formed bath bombs in the fridge for 30 minutes before removing.
- Avoid overworking the mixture, which can make it too soft or crumbly.
Following these steps helps create sturdy, well-shaped bath bombs that look great and hold their form in the bath.
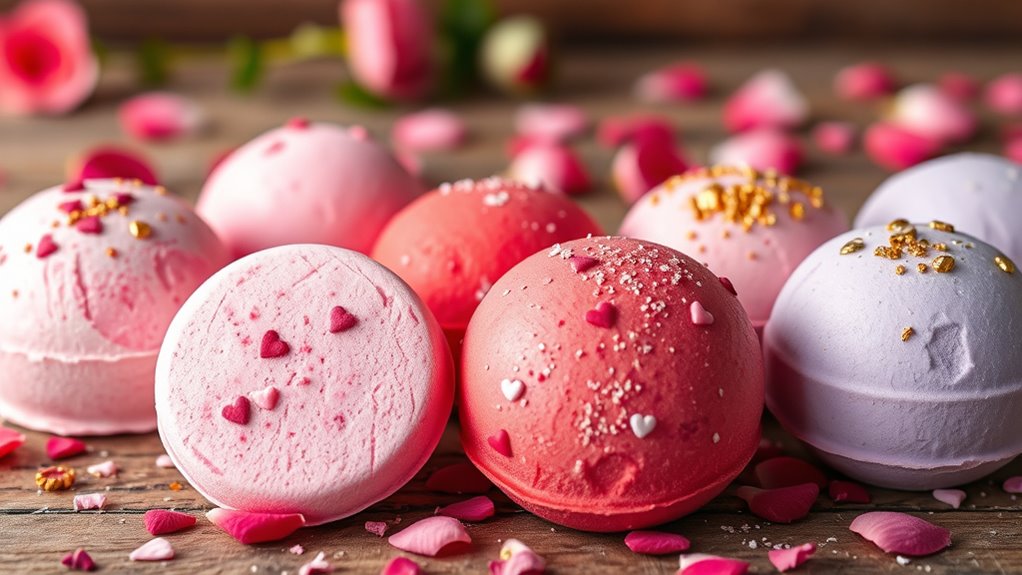
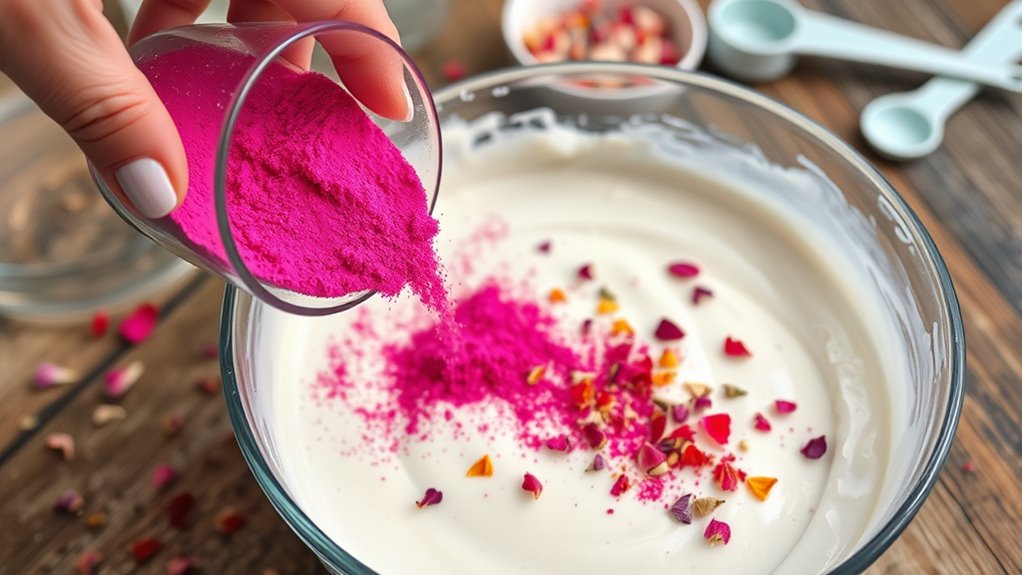
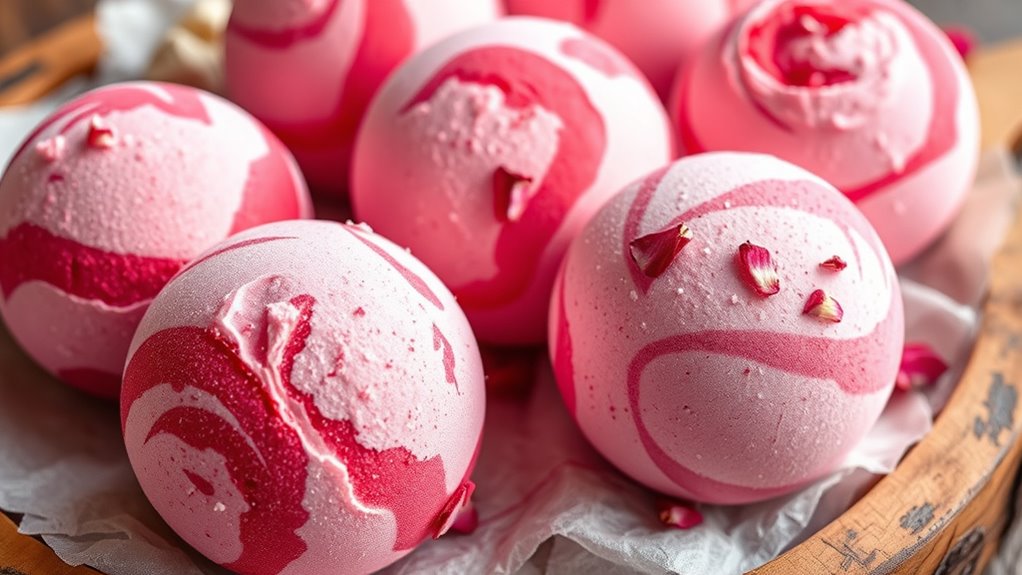
Adding Personal Touches and Decorations
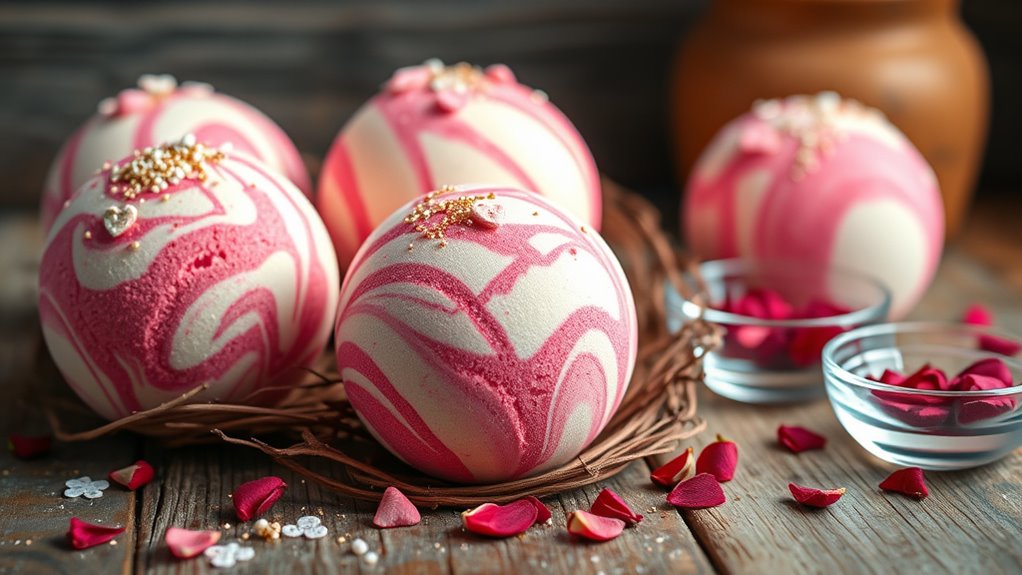
Adding personal touches and decorations can make your DIY Valentine’s Day bath bombs truly unique and special. You can embed small surprises like dried rose petals, tiny love notes, or glitter for a sparkling effect. Using food coloring or natural dyes allows you to create vibrant, personalized colors that match your mood or theme. Consider pressing in small silicone molds to add tiny heart-shaped decorations or embedding essential oils for a soothing scent. If you want a more elegant look, drizzle melted chocolate or colored icing on top once the bath bombs are dry. You can also attach ribbons, charms, or stickers to give your bath bombs a festive, handcrafted feel. These small details turn simple bath bombs into thoughtful, customized gifts perfect for Valentine’s Day.
Allowing the Bath Bombs to Dry and Harden
To guarantee your bath bombs dry properly, place them in an area with good air circulation. Giving them enough time to harden prevents crumbling and ensures they hold together when used. Patience with the wait time results in a better, longer-lasting bath bomb.
Proper Air Circulation
Ensuring proper air circulation is essential for your bath bombs to dry and harden correctly. Without it, they might stay damp or develop cracks. To optimize airflow, place your bath bombs in a well-ventilated area. Here’s what to keep in mind:
- Choose a cool, dry spot away from direct sunlight or humidity.
- Use a wire rack or mesh tray to elevate the bath bombs, allowing air to circulate around all sides.
- Avoid stacking them directly on top of each other to prevent trapping moisture.
- Leave enough space between each bomb so air can reach all surfaces evenly.
This setup helps your bath bombs dry uniformly, ensuring they’re firm and ready for use.
Wait Time Optimization
Allowing your bath bombs enough time to dry and harden is essential for achieving their best texture and durability. After shaping your mixture, place the bombs on a tray lined with parchment paper or a wire rack, making certain good air circulation. Let them sit at room temperature for at least 24 hours, or longer if possible, to fully harden. Rushing this process can cause crumbling or misshapen bombs. During drying, avoid touching or moving them excessively to prevent dents or cracks. Proper wait time guarantees the baths bombs hold together when used and dissolve smoothly in your bath. Patience here guarantees a polished look and better performance, making your DIY project not only fun but also functional.
Packaging and Presenting Your Handmade Bombs

Once you’ve crafted your heart-shaped bath bombs, presenting them beautifully can make your gift even more special. Start by choosing clear cellophane bags or decorative boxes to showcase the bombs. Tie them with colorful ribbons or twine for a charming touch. Consider adding a personalized tag with a heartfelt message or the recipient’s name. You might also include a small card with instructions for use or a sweet note. To elevate the presentation, arrange your bombs on a decorative tray or in a gift basket, adding some rose petals or small candles for ambiance. Here’s a quick visual:
- Clear cellophane bags with ribbon ties
- Elegant gift boxes with compartments
- Personalized tags or cards
- Decorative arrangements with petals and candles
Tips for Customizing and Troubleshooting
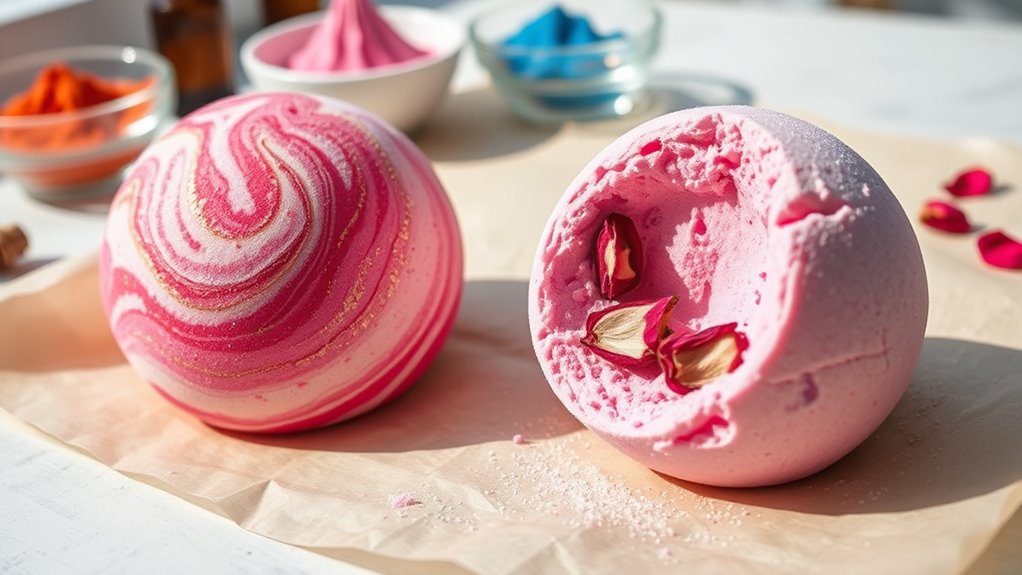
To customize your bath bombs effectively, start by experimenting with different scents, colors, and additives like dried flowers or essential oils to create a unique and personalized experience. If your mixture doesn’t hold together, adjust the moisture level by lightly spraying with water or adding more baking soda. For troubleshooting, guarantee your ingredients are fresh and measured accurately. Overly dry or wet mixtures can cause crumbling or fizzing issues. Use the table below for quick tips:
| Issue | Cause | Solution |
|---|---|---|
| Crumbling during use | Mixture too dry | Add a few drops of witch hazel |
| No fizzing upon drop | Insufficient activation | Increase citric acid content |
| Color bleeding | Excess liquid or incompatible dyes | Use skin-safe, concentrated colorants |
| Uneven texture | Poor mixing | Mix thoroughly before molding |
Frequently Asked Questions
How Long Do Homemade Bath Bombs Typically Last?
Homemade bath bombs usually last about 4 to 6 months if stored properly. Keep them in an airtight container away from moisture, heat, and direct sunlight to maintain their fizz and scent. Over time, the ingredients can lose their effectiveness or become crumbly. If you notice a change in smell, texture, or color, it’s best to use them sooner to enjoy the full experience.
Can I Use Edible Ingredients in My Bath Bombs?
Using edible ingredients in your bath bombs is like adding sprinkles to a cake—fun, but not always practical. While some edible items, like dried herbs or edible glitter, can be safe, avoid using ingredients meant for consumption, like food coloring or flavorings, as they might irritate your skin or clog your drain. Stick to skin-safe, cosmetic-grade ingredients for the best, safest bath experience.
Are There Any Safety Tips for Children Making Bath Bombs?
When kids make bath bombs, safety is key. You should supervise closely, ensuring they don’t handle harsh ingredients or use too much of any substance. Make sure they wash their hands afterward and avoid inhaling powders. Keep all ingredients out of reach when not in use, and teach them to work in a well-ventilated area. Always read labels and follow safety instructions for each ingredient to prevent accidents.
How Do I Prevent My Bath Bombs From Cracking?
Imagine your bath bomb as a delicate sculpture, needing just the right touch. To prevent cracking, guarantee your mixture isn’t too dry or too wet—add small amounts of water gradually. Mix thoroughly but gently, and press firmly into molds. Let your bath bombs dry completely in a cool, dry place. Patience is key—rushing the process can cause cracks, so give them time to set properly.
Can I Make Bath Bombs Without Using Baking Soda?
You wonder if you can make bath bombs without baking soda. While baking soda is a key ingredient for fizzing and texture, you can try using alternatives like citric acid combined with other gentle powders like cornstarch or kaolin clay. Keep in mind, the fizz might change or be less intense. Experimenting with these ingredients can help you create unique bath bombs without baking soda, but expect some differences.
Conclusion
Creating your own Valentine’s Day bath bombs isn’t just fun—science suggests that the act of crafting and gifting them can boost your mood and strengthen bonds. As you experiment with scents, colors, and personal touches, remember that the process itself releases feel-good endorphins. So, enjoy each step, knowing you’re not only making a unique gift but also embracing a joyful, therapeutic activity that’s been used for centuries to promote relaxation and happiness.