

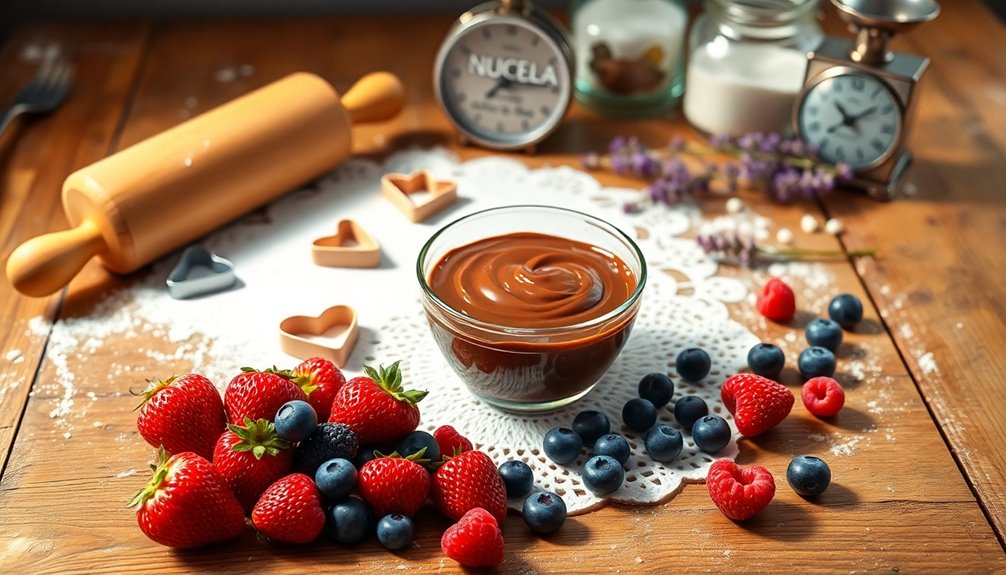
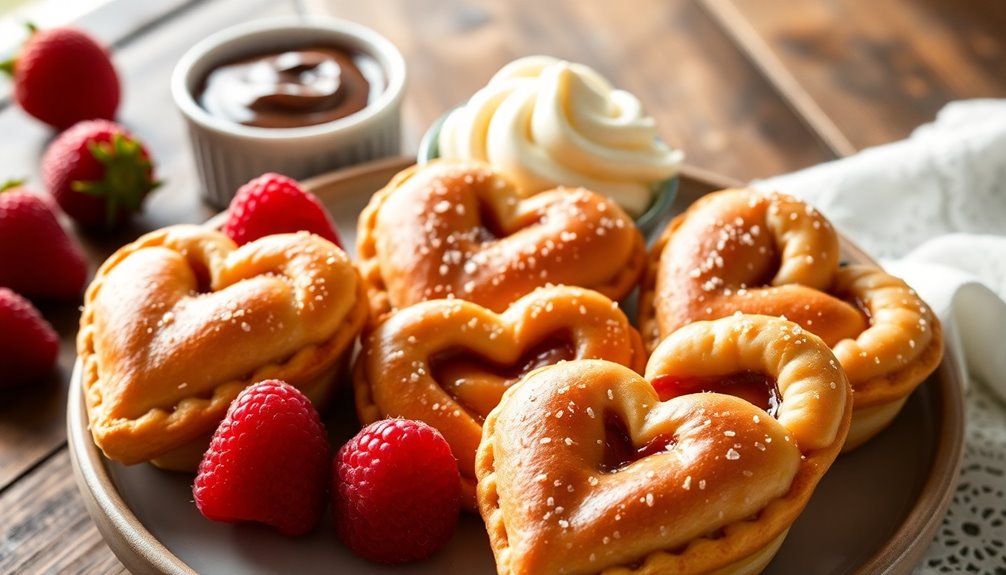
Mini berry Nutella heart pies are the perfect Valentine's Day treat for you and your loved one. They're easy to make using pre-made pie crusts, so you can focus on designing heart shapes filled with a delicious Nutella and berry mixture. Just bake until golden brown and serve warm, maybe with a scoop of vanilla ice cream. These mini pies not only taste amazing, but they also create lovely memories in the kitchen together. Discover how to make them below!
History
Valentine's Day has a rich history that dates back to ancient Rome, where the feast of St. Valentine was celebrated in mid-February. This tradition honors a priest who secretly married couples against Emperor Claudius II's orders.
Over time, the heart shape became a symbol of love, reflecting the deep emotions associated with the human heart. By the 18th century, the custom of exchanging gifts emerged, paving the way for chocolates, flowers, and handmade treats.
The introduction of mass-produced Valentine's cards in the 19th century, thanks to Esther Howland, commercialized the holiday further.
Today, miniature baked goods like mini heart pies and heart-shaped hand pies are popular Valentine's Day desserts, perfectly celebrating love while allowing for creativity and family fun. Additionally, the celebration of love can be seen throughout history, as ancient cultures, such as the Egyptians, emphasized the significance of family and community ties in their expressions of affection.
Recipe
Ingredients:
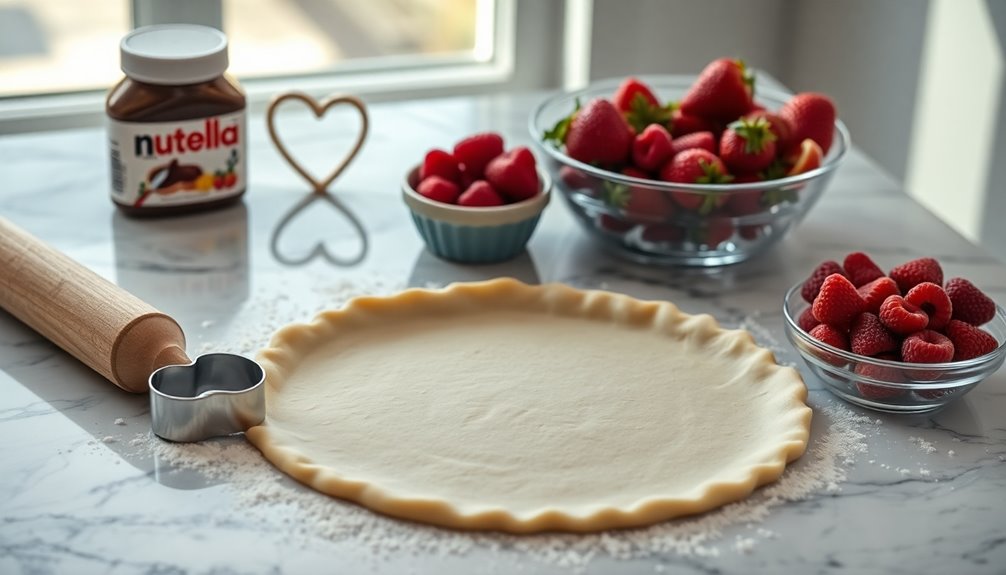
- Pre-made pie crust
- Nutella
- Strawberry or raspberry filling
- Egg (for egg wash) or water
- Coarse sugar (for sprinkling)
Instructions:
Begin by preheating your oven to 400°F.
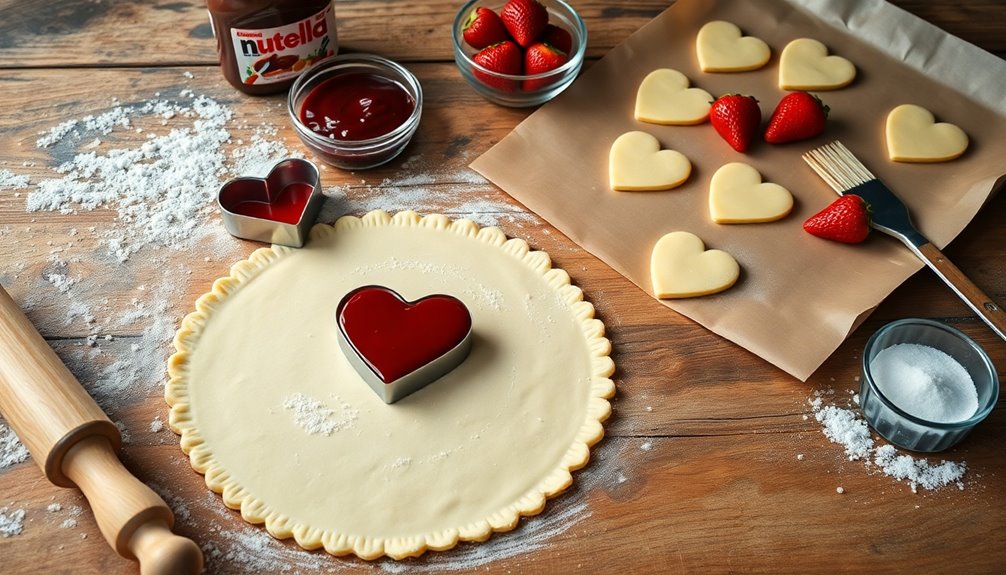
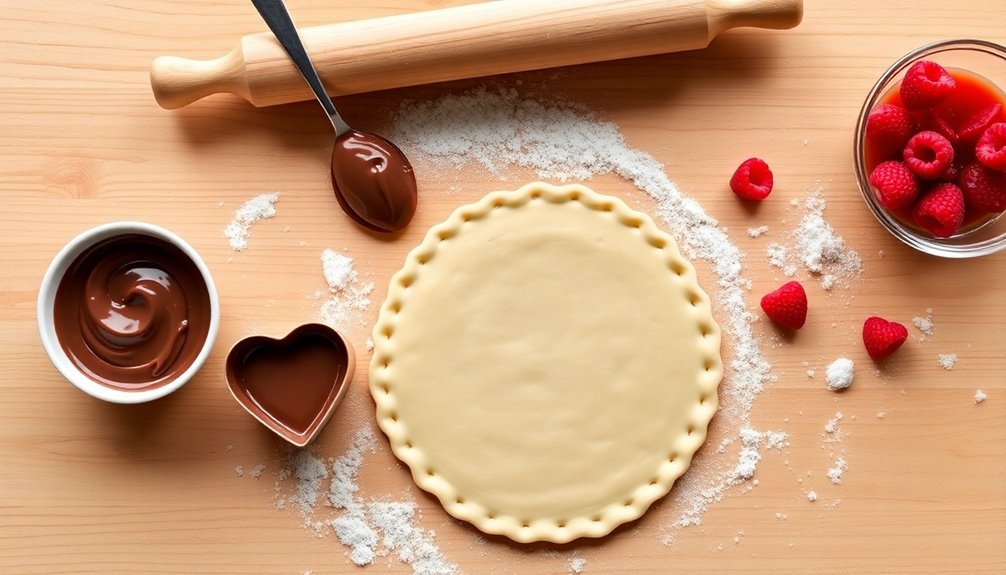
Roll out the pre-made pie crust on a lightly floured surface and use a mini heart cookie cutter to cut out 3.5-inch heart shapes.
Place half of the heart shapes on a baking sheet lined with parchment paper.
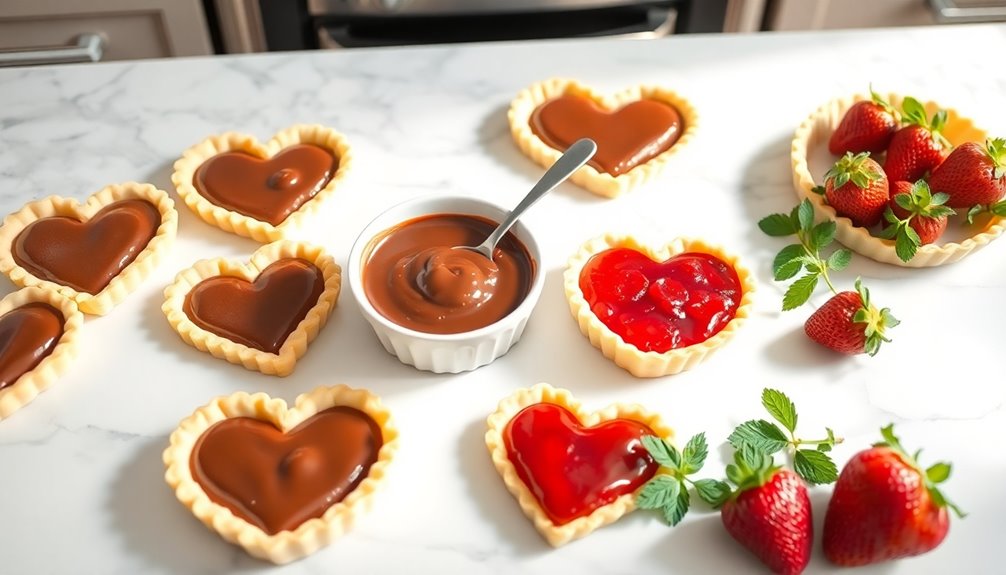
Spoon a small amount of Nutella and berry filling onto the center of each heart, being careful not to overfill.
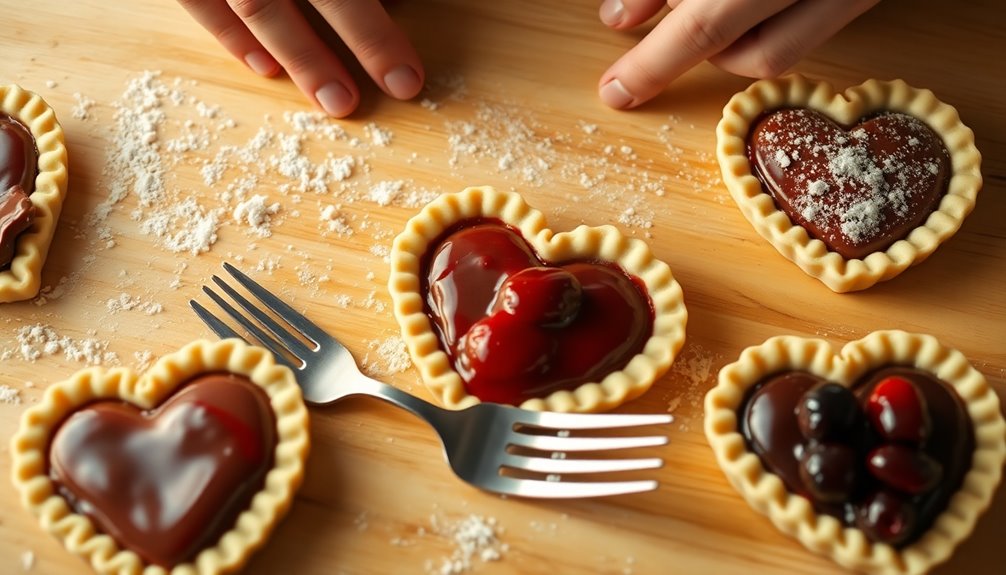
Take the remaining heart shapes, place them on top of the filled ones, and seal the edges by pressing down gently with your fingers or a fork.
Brush the tops with an egg wash or water, and sprinkle coarse sugar on top for added sweetness.
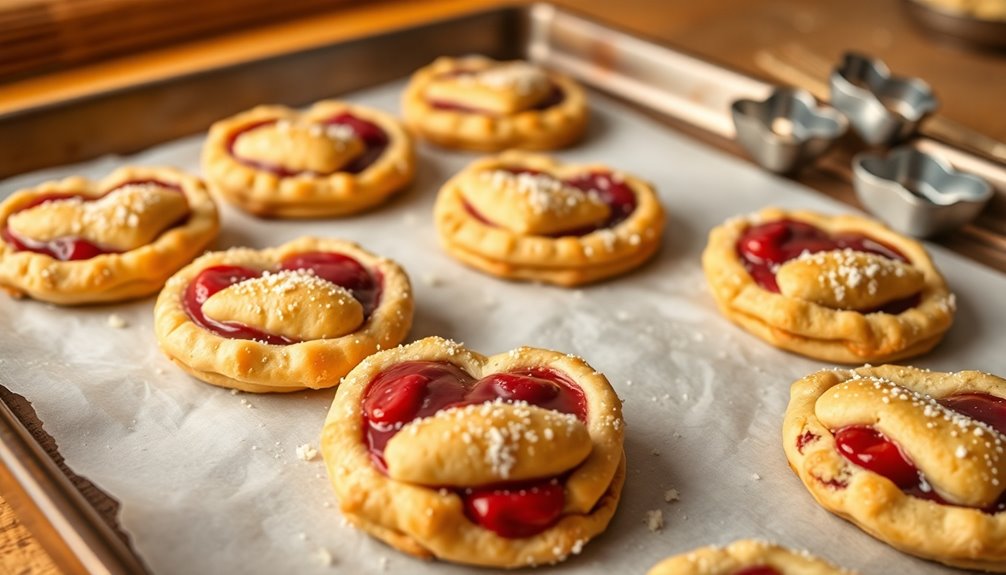
Bake in the preheated oven for 15-20 minutes, or until the pies are golden brown and flaky.
Extra Tips:
For the best results, guarantee that your pie crust is chilled before rolling it out, as this helps maintain its flakiness during baking.
You can experiment with different berry fillings or even mix in some chocolate chips for an extra indulgent treat.
Serve the pies warm, and consider pairing them with a scoop of vanilla ice cream, some fresh berries, or a drizzle of melted Nutella for a truly delightful dessert experience.
Enjoy!
Cooking Steps
To start making your Mini Berry Nutella Heart Pies, you'll want to prepare your dough and roll it out for easy handling.
Next, fill your heart shapes with the delicious Nutella mixture and seal the edges securely to keep everything inside.
Finally, bake them until they're golden brown and ready to enjoy!
Step 1. Prepare the Dough
Start by letting your pre-made pie crust warm up slightly at room temperature; this makes rolling and cutting much easier.
Once ready, roll out the dough on a lightly floured surface. Use a mini heart cookie cutter to cut out shapes, ideally around 3.5 inches in size.
Gather any dough scraps, re-roll them, and continue cutting until you have enough hearts for your Nutella hand pies.
Fill half of these heart shapes with a delicious mixture of Nutella and your choice of berry filling, like strawberry and Nutella or raspberry compote.
Seal the edges with an egg wash or water, crimping with a fork to guarantee they stay closed while baking.
Additionally, the size of your screen can enhance the overall experience when enjoying these treats during a movie night.
Place them on parchment paper and get ready for golden brown perfection!
Step 2. Roll Out the Dough
Once your pie dough has warmed up, roll it out on a lightly floured surface until it's about 1/8 inch thick. This thickness gives your mini pies the perfect texture.
Using a 3.5-inch heart-shaped cookie cutter, cut out heart shapes from the rolled dough. Don't worry about the scraps; gather them up, re-roll the dough, and keep cutting until you have enough hearts for your mini pies.
After cutting, make sure to seal the edges of each heart properly by pressing them with a fork or your fingers. This step prevents any filling from leaking during baking.
Once you've sealed them, you're all set to fill your lovely heart pies with deliciousness!
Step 3. Fill With Nutella Mixture
Now it's time to bring your mini heart pies to life with a delicious Nutella filling.
Start by mixing 1/3 cup of Nutella with 1/3 cup of strawberry puree, preserve, or jam to create your filling.
Using a mini heart cookie cutter, cut out 3.5-inch heart-shaped pieces from your puff pastry.
Place a spoonful of the Nutella mixture on one half of each heart, being careful not to overfill.
Fold the other half over the filling, and use an egg wash to seal the edges tightly.
Don't forget to create small steam holes on top of each pie to allow steam to escape while baking.
This will help them turn a beautiful golden brown and guarantee a delightful treat!
Step 4. Seal the Edges Securely
To guarantee your mini heart pies don't leak during baking, sealing the edges securely is essential. Start by applying an egg wash or a little water along the edges of the pie crust before pressing them together. This helps create a better seal.
Firmly crimping the edges with a fork not only reinforces the seal but also adds a decorative touch to your mini pies. Make sure to press them well to avoid any filling leakage, ensuring a neat presentation.
For added security, use a small heart-shaped cookie cutter to create a decorative cutout in the top layer of dough, allowing steam to escape while keeping the filling intact. Proper sealing results in a golden, crispy crust that's truly delightful!
Step 5. Bake Until Golden Brown
Preheat your oven to 400°F, setting the stage for perfectly baked mini heart pies.
Once your pies are filled with Nutella and your choice of strawberry or raspberry, it's time to get them in the oven.
Place the heart-shaped pies on a baking sheet lined with parchment paper for easy cleanup.
Bake the pies for 20 to 25 minutes, keeping an eye on them as they cook.
You'll know they're ready when the tops are golden brown, and the filling starts to bubble.
These delightful mini pies make a charming treat for your Valentine, showcasing the delicious combination of Nutella and berries.
Let them cool slightly before serving, and enjoy the love in every bite!
Final Thoughts
While these Mini Berry Nutella Heart Pies are sure to impress, they also bring families together in the kitchen.
They're not only delicious but easy to make, especially with pre-made pie crusts that cut down on prep time. As you roll out the heart-shaped pastries, kids can help fill them with the rich Nutella and sweet berries, creating lasting memories.
After baking them warm, serve with a scoop of vanilla ice cream for an irresistible treat. The vibrant fillings offer a festive touch to your Valentine's Day dessert table, making it visually appealing.
These hand pies are a delightful combination of flavors, ensuring every bite is packed with deliciousness that your loved ones will cherish. Additionally, consider incorporating chia seeds into your recipes for added nutrition and health benefits.
Enjoy baking and sharing!
Frequently Asked Questions
Can I Use Different Types of Berries for These Pies?
Absolutely, you can use different types of berries for those pies!
Feel free to mix and match blueberries, raspberries, strawberries, or even blackberries to create your perfect filling. Each type of berry brings its unique flavor, so experiment until you find a combination you love.
Just make sure to adjust the sweetness if some berries are tarter than others. Enjoy the creative process and have fun with your berry choices!
How Do I Store Leftover Mini Heart Pies?
When it comes to storing your leftover treats, think of them as precious gems that deserve the best care.
You'll want to let them cool completely before wrapping each pie in plastic wrap or placing them in an airtight container.
Keep them in the fridge for up to four days, ensuring they stay fresh and delightful.
If you'd like to savor them longer, freeze them for up to a month—just thaw before enjoying!
Can I Freeze These Pies for Later Use?
Yes, you can definitely freeze those pies for later use!
To do this, wrap each pie tightly in plastic wrap or aluminum foil, then place them in an airtight container or freezer bag.
Make sure to label them with the date.
When you're ready to enjoy them, just thaw them in the refrigerator overnight or warm them in the oven for a few minutes.
That way, they'll taste fresh and delicious!
What Are Some Alternative Fillings for These Heart Pies?
Imagine a canvas awaiting vibrant colors; your heart pies can transform with a variety of fillings.
You could swap Nutella for creamy peanut butter or rich chocolate ganache. Fresh fruits like bananas or caramelized apples add sweetness, while a mix of cream cheese and lemon zest offers a tangy twist.
Don't forget to sprinkle some cinnamon or nutmeg for warmth. Let your creativity flow, and you'll craft delightful surprises in each bite!
How Can I Make These Pies Gluten-Free?
To make these pies gluten-free, you can substitute regular flour with a gluten-free flour blend. Look for one that includes xanthan gum for better texture.
When preparing your crust, make certain all other ingredients, like baking powder, are also gluten-free. You can also consider using almond flour or coconut flour for a different flavor profile.
Finally, always check labels to avoid any hidden gluten in your fillers or toppings. Enjoy your gluten-free treat!