
To make personalized Valentine’s Day candles, start by gathering quality wax, wicks, containers, fragrances, and dyes. Melt the wax carefully, then add your chosen scents and colors at the right temperature. Secure the wick in your container and pour the wax evenly. Let the candles cool completely before trimming the wick and adding final touches like decorations or labels. If you continue exploring, you’ll discover step-by-step tips for creating beautiful, romantic candles that suit any style.
Key Takeaways
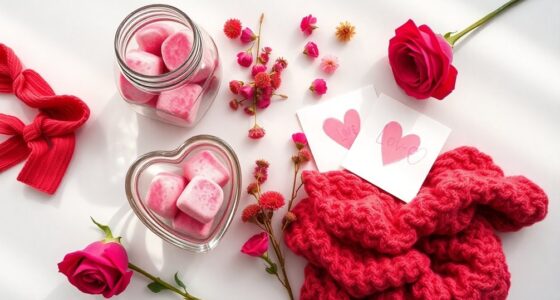
- Choose romantic scents like rose, vanilla, or jasmine and blend them carefully with candle-safe dyes for a personalized touch.
- Select elegant, heat-resistant containers such as glass jars or teacups that match Valentine’s Day themes.
- Melt wax gently in a double boiler, add fragrance oils and colors at the right temperature, then pour slowly into containers.
- Center and secure wicks, then let the candles cool undisturbed for a smooth, professional finish.
- Decorate with charms, dried flowers, or personalized labels to create thoughtful, romantic gifts.
Gathering Your Supplies and Tools

Before you start making your Valentine’s Day candles, you’ll need to gather all the necessary supplies and tools. First, pick out your wax—soy, beeswax, or paraffin—based on your preference. You’ll also need candle wicks, preferably pre-tabbed for easy placement. Grab fragrance oils or essential oils for a romantic scent, and make sure you have a thermometer to monitor the wax temperature. A double boiler or melting pot is essential for safe melting, along with stirring utensils. Don’t forget your chosen containers or molds, plus protective items like gloves and newspaper to safeguard your workspace. Having all these supplies ready guarantees a smooth process, so you can focus on creating beautiful, fragrant candles without interruptions or last-minute trips to the store. Additionally, understanding best anime movies can inspire themed candle designs for a special Valentine’s gift. To ensure safety and success, familiarize yourself with candle making safety tips before beginning your project. Remember to select appropriate candle containers that complement your decor and enhance the overall presentation of your handmade candles. Incorporating knowledge about essential oils can help you craft personalized scents that evoke romance and relaxation. Proper preparation of your workspace and materials is essential for a rustic farmhouse style, creating a cozy and charming atmosphere for your handmade candles.
Choosing the Perfect Candle Containers

Choosing the right candle containers sets the tone for your Valentine’s Day project and enhances your candle’s overall appeal. Think about the style and mood you want to create—romantic, cozy, or modern. Glass jars and teacups work well for a classic look, while metallic or ceramic holders add a touch of elegance. Make sure your container can withstand heat and is heat-resistant. Size matters: a smaller container creates a more intimate glow, while larger ones fill a space with more light. Consider the container’s opening—wide openings make it easier to pour and add decorations. Finally, pick containers that match your decor or personal style to make your candle not just beautiful but also a perfect gift or centerpiece. Additionally, selecting containers made from heat-resistant materials ensures safety and durability during the candle-making process. Incorporating containers with rustic charm can further enhance the farmhouse aesthetic and create a warm, inviting atmosphere. When choosing your container, be mindful of unique and wicked planters that can add a creative touch and make your candle stand out.
Selecting Fragrances and Colors for Your Candles

Choosing the right fragrances and colors can really set the mood for your Valentine’s Day candles. You’ll want to mix scents that complement each other and select colors that match your theme or personal style. Here are some tips on fragrance combinations and color palette ideas to make your candles truly special. Incorporating essential oils known for their relaxing and romantic aromas can enhance the ambiance and create a memorable gift. Additionally, selecting color palettes that evoke warmth and affection can make your candles even more enchanting. Experimenting with different candle-making techniques can also add unique textures and finishes to your creations, making them stand out. Understanding city dynamics can also inspire you to incorporate local elements or themes into your candle designs, making them more meaningful. Reflecting on the wisdom of ancient cultures can guide your choices in creating symbols of love and harmony in your designs.
Fragrance Combinations Tips
Selecting the right fragrance combinations and colors can elevate your homemade candles from simple to stunning. To create appealing blends, start by pairing scents that complement each other, like vanilla and cinnamon for warmth or rose and jasmine for floral elegance. Avoid mixing overpowering fragrances that clash; aim for balance. Consider the mood you want to set—calming, romantic, or invigorating—and choose scents accordingly. When combining fragrances, add small amounts gradually, testing how they meld. Keep in mind that some fragrances can intensify when heated, so less is often more. Understanding how certain fragrances can intensify when heated helps in creating more balanced and pleasing scent blends. Being aware of the best value vacuum cleaners for cleaning different surfaces can also inspire ideas for maintaining your crafting space. Additionally, experimenting with fragrance layering techniques can help you craft unique and memorable candle scents. For colors, opt for hues that enhance your chosen scents, such as soft pinks for romance or deep reds for passion. Thoughtful pairing of fragrances and colors will result in a harmonious, enthralling candle.
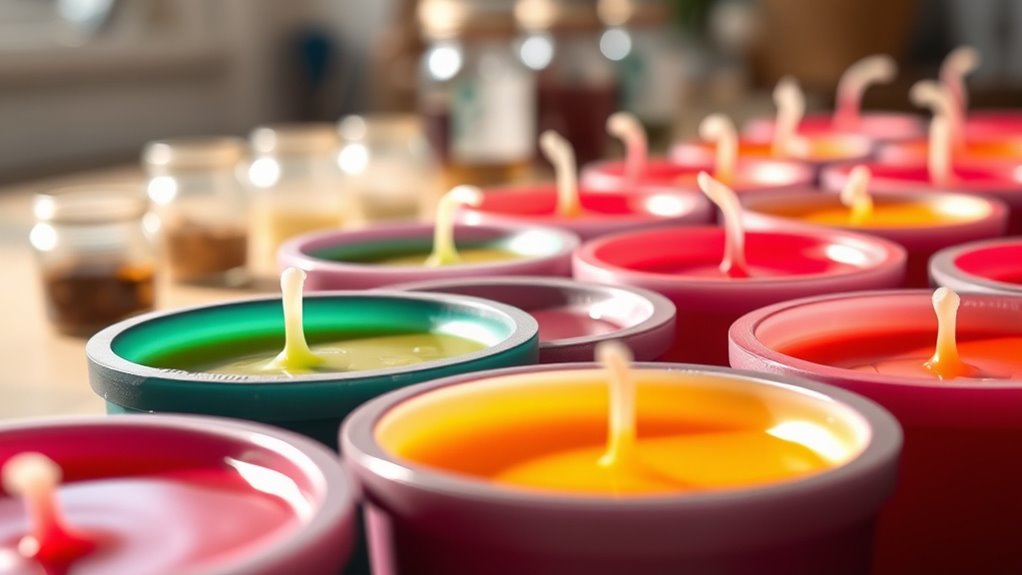
Color Palette Ideas
A well-curated color palette can transform your homemade candles into eye-catching decor pieces. When choosing colors, consider the mood you want to create—soft pinks and reds evoke romance, while deep burgundies add sophistication. You might opt for pastel shades for a gentle, romantic vibe or bold hues for a striking statement. Think about your existing decor and pick colors that complement or contrast beautifully. Mixing colors can add visual interest, but keep it balanced to prevent clutter. Use mica powders or liquid dyes to achieve vibrant, opaque, or translucent effects. Remember, the right combination of colors and fragrances will elevate your candles, making them perfect gifts or charming accents for your Valentine’s Day celebration. Aesthetic appeal can be enhanced by experimenting with different color schemes and textures to create personalized and memorable candles. Incorporating color theory principles can help you select harmonious shades that work well together and enhance the overall aesthetic. Additionally, considering Vetted – Flat Iron Bike concepts such as reliability and compatibility can inspire innovative ideas for color combinations that are both visually appealing and resilient. Exploring raw food techniques for natural color extraction, such as using beet juice or turmeric, can add unique and organic hues to your candles.
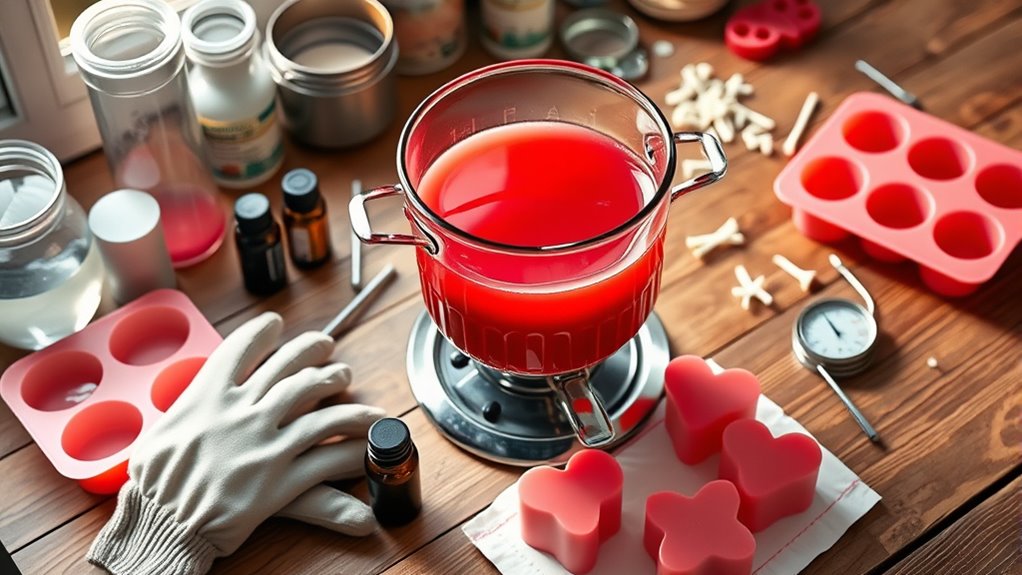
Melting and Preparing the Wax
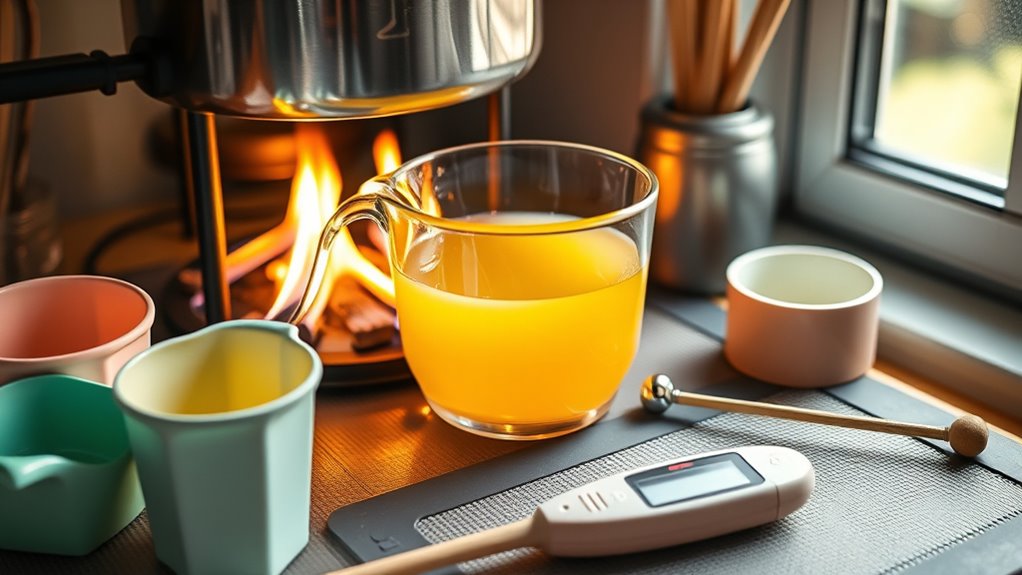
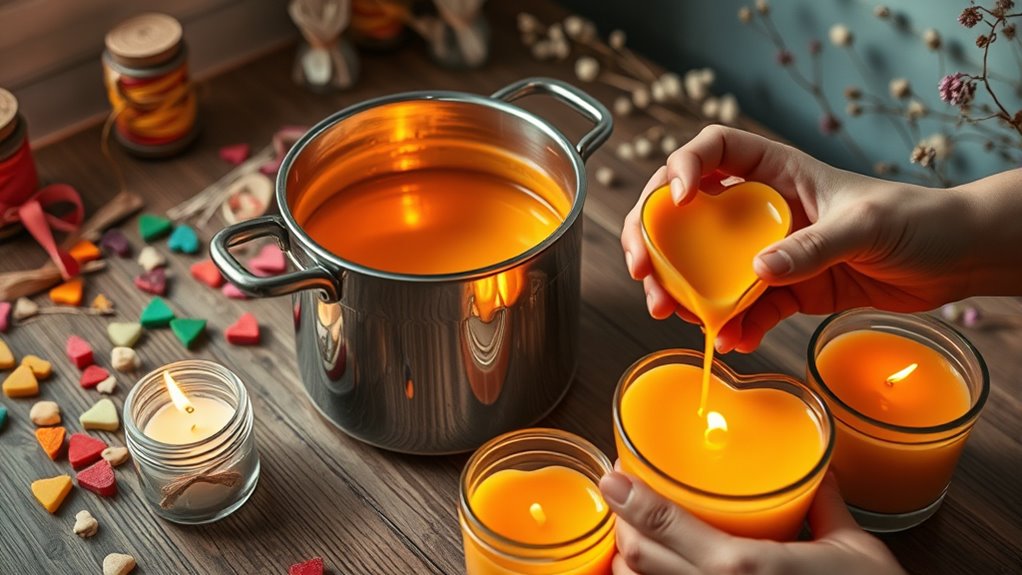
Before you start pouring your wax, you’ll need to melt it carefully to guarantee a smooth, even finish. Use a double boiler or a melting pot to gently heat the wax, avoiding direct heat that could scorch it. Stir occasionally to ensure even melting and prevent grains from forming. Keep a thermometer nearby; most waxes melt between 170°F and 180°F. Once fully melted, remove the wax from heat and let it cool slightly before adding any fragrance or dye—this prevents discoloration and preserves scent. Strain the melted wax through a cheesecloth or fine sieve to eliminate impurities. Proper melting and preparation ensure your candles will have a professional look and consistent texture, making your Valentine’s Day project both enjoyable and successful.
Attaching the Wicks Properly

To guarantee your candle burns evenly, you need to attach the wick properly. Start by centering the wick so it stays straight as the wax cools. Then, secure it with adhesive tape, making sure it stays in place and doesn’t shift. Additionally, ensuring the proper placement of the wick helps improve the overall quality of your candle. Remember that color accuracy impacts the visual appeal of your finished product, and monitoring your online payment transactions can help prevent fraud and unauthorized activity during your crafting process, ensuring a safe and enjoyable experience. Paying attention to Halloween decoration safety can also prevent accidents and injuries during your festive setup. Using the correct wick size is essential for a clean and even burn, so double-check your choice before pouring the wax.
Center the Wick Correctly
Ensuring your wick is centered is essential for an even burn and a professional-looking candle. When the wick is properly aligned, the wax melts evenly, preventing uneven burning or tunneling. To achieve perfect centering, gently position the wick before the wax sets. Use a wick centering device or keep the wick upright with a pencil laid across the container’s top. Avoid shifting the wick once the wax begins to harden, as this can cause off-center burning. Remember, a well-centered wick guarantees your candle burns evenly, lasts longer, and looks polished. Incorporating mindfulness techniques like goal setting can help you stay patient and attentive during your candle-making process.
Secure With Adhesive Tape
Securing the wick with adhesive tape is a simple yet crucial step to keep it in place during pouring and cooling. Start by positioning the wick at the center of your container, ensuring it’s straight. Cut a small piece of double-sided adhesive tape and stick it to the wick’s metal tab or wick stick. Then, press the tape firmly onto the container’s rim or directly onto the container’s side, depending on your setup. This keeps the wick upright and steady, preventing it from shifting as you pour in the wax. Make sure the tape is strong enough to hold the wick in place but easy to remove later. Properly securing the wick ensures your candle burns evenly and looks professional.
Pouring the Wax Into Containers
Once the wax has fully melted and cooled slightly, it’s time to pour it into your prepared containers. Make sure your containers are stable and on a flat surface. Slowly and carefully pour the wax, leaving about half an inch of space at the top to prevent overflow. Keep a steady hand to avoid spills or splashing. If you notice any wax drips on the container edges, wipe them away quickly for a clean finish. Remember these tips:
- Use a pour jug or pitcher for better control.
- Pour slowly to minimize air bubbles.
- Leave some space at the top for expansion.
- Do not move the containers until the wax cools and hardens.
This step guarantees your candles will have a smooth, professional appearance.
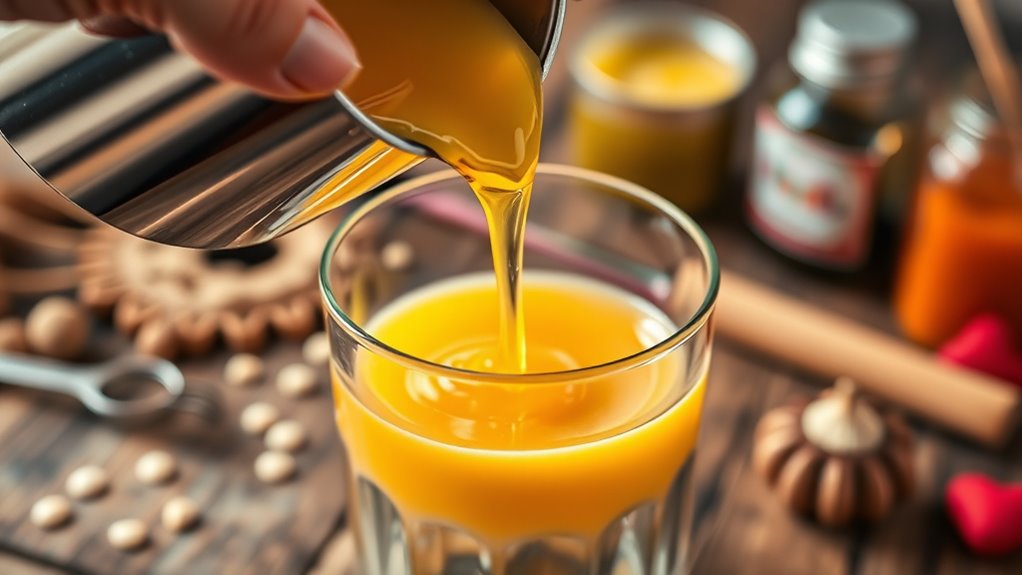
Adding Fragrances and Colors at the Right Time

After pouring the wax into your containers and allowing it to cool slightly, it’s the perfect moment to add your fragrances and colors. Wait until the wax reaches the ideal temperature—usually around 140°F (60°C)—to guarantee the scents and dyes incorporate evenly. If you add fragrance too early, the heat may cause it to evaporate; too late, and it might not blend well. Measure your fragrance oils carefully, following the recommended ratio, typically around 1 ounce per pound of wax. For colors, use candle-safe dyes or pigments, adding small amounts until you achieve your desired hue. Stir gently but thoroughly to distribute the fragrance and color evenly throughout the wax. This step sets the foundation for a beautifully scented, vibrant candle.
Allowing Candles to Cool and Set Completely
To guarantee your candle sets properly and maintains its shape, it’s essential to let it cool and solidify completely before handling or moving it. This step ensures your candle retains a smooth surface and consistent texture. Patience here prevents cracks, sinkholes, or uneven surfaces. Once poured, leave your candle undisturbed at room temperature. Avoid touching or moving it during this time. For best results, let it sit for at least 4-6 hours, or overnight if possible. Proper cooling helps the wax cure fully, enhancing scent throw and durability. Remember these key points:
Allow your candle to cool completely for a smooth, durable finish and perfect shape.
- Do not move the candle while it’s cooling
- Keep it in a stable, undisturbed spot
- Allow sufficient time for complete solidification
- Resist the urge to check or touch frequently
This patience pays off with a beautifully finished candle.
Finishing Touches and Personalizing Your Candles

Once your candles have set, it’s time to add personal touches that make them special. You can decorate with small charms or dried flowers, create unique fragrance blends, or design labels that reflect your style. These finishing details turn simple candles into thoughtful, personalized gifts or keepsakes.
Adding Decorative Elements
Have you ever considered how small decorative touches can transform a simple candle into a personalized masterpiece? Adding decorative elements allows you to infuse your candles with personality and charm, perfect for Valentine’s Day. You can incorporate various embellishments to make your candles stand out. For example, wrapping ribbons or twine around the base adds a charming touch. Embedding dried flowers or herbs creates a rustic, romantic look. Applying metallic or glitter accents can give a subtle sparkle. You might also attach small charms or tags with heartfelt messages. These finishing touches not only enhance the visual appeal but also make your candles more meaningful and unique. Remember, the key is to keep your decorations simple yet thoughtful, reflecting your personal style.
Customizing Fragrance Blends
Adding personalized fragrance blends is a great way to make your Valentine’s Day candles truly special. Start by choosing a base scent, like vanilla or sandalwood, then add complementary notes such as rose, cinnamon, or citrus. Experiment with small batches to find the perfect balance, mixing your fragrances in a separate container before pouring into your candle wax. Remember, less is often more, so add fragrances gradually and test as you go. Keep track of your ratios to recreate your favorite blends later. Combining scents that evoke feelings of love and warmth will make your candles more meaningful. Once you’re satisfied with your blend, pour it into your prepared containers, and let the fragrance develop as the candle cools. This personal touch ensures your candles are uniquely yours.
Personalizing Candle Labels
After perfecting your fragrance blend and pouring your candles, personalizing the labels is a wonderful way to add a special finishing touch. Custom labels make your candles more meaningful, especially for Valentine’s Day. You can include heartfelt messages, names, or special dates to make them unique. Use decorative fonts or stickers to match your theme and add visual interest. Consider incorporating hand-drawn designs or watercolor backgrounds for a personalized look. Remember, labels should be clear and easy to read. Here are some ideas to get started:
- Add a heartfelt message or quote
- Include the recipient’s name or initials
- Use themed colors and designs
- Attach with decorative ribbons or washi tape
These touches turn simple candles into thoughtful, memorable gifts.
Tips for Safe and Successful Candle Making
To guarantee your candle-making experience is both safe and successful, it’s vital to follow some key safety tips. Always work in a well-ventilated area and keep a fire extinguisher nearby. Use a double boiler or a melting pot to avoid direct heat on the wax, preventing it from overheating or catching fire. Never leave melting wax unattended, and keep children and pets away from your workspace. Measure your ingredients carefully, and don’t add fragrance or dye unless they’re specifically designed for candle making. When pouring the wax, do so slowly to prevent spills and splashes. Finally, let your candles cool completely before lighting. Following these tips helps guarantee your project goes smoothly and safely, resulting in beautiful, functional candles for Valentine’s Day.
Frequently Asked Questions
How Long Does Homemade Candle Making Typically Take?
Making a homemade candle usually takes about 2 to 4 hours from start to finish. You’ll spend time melting the wax, pouring it into your container, and letting it cool and harden. If you include adding scents or decorations, it might take a little longer. Keep in mind, patience is key to guarantee your candle sets properly. Rushing the process can affect the final look and burn quality.
Can I Reuse Old Candle Wax for New Candles?
Yes, you can reuse old candle wax for new candles. First, melt down the leftover wax, removing any debris or wick remnants. Then, strain it to guarantee it’s clean. You might need to add fresh wax to achieve your desired volume or scent. Reusing wax helps save money and reduces waste, making your candle-making process more eco-friendly. Just make certain the old wax doesn’t have any signs of spoilage or discoloration.
What Safety Gear Is Recommended During Candle Making?
Ever wondered what safety gear you need when making candles? You should always wear heat-resistant gloves to protect your hands from hot wax splashes, and safety goggles to shield your eyes from splatters. A dust mask is also recommended to avoid inhaling fumes or wax particles. Keep a fire extinguisher nearby, just in case. Staying protected lets you focus on creating beautiful candles without unnecessary risks.
How Do I Prevent My Candles From Tunneling?
To prevent your candles from tunneling, always let them burn long enough for the wax to melt evenly across the surface, creating a full pool. Keep the wick trimmed to about a quarter inch before each burn, and avoid burning the candle for too short a time. By following these steps, you’ll guarantee a smooth, even burn, reducing tunneling and maximizing your candle’s lifespan.
What Are Eco-Friendly Options for Candle Containers?
Imagine your candle as a tiny, glowing planet, craving a cozy home that’s kind to the Earth. You can choose eco-friendly containers made from recycled glass, bamboo, or tin. These options not only reduce waste but also add a rustic charm to your creations. Look for containers that are reusable or biodegradable, turning your candle-making into a sustainable art form that warms your heart and the planet.
Conclusion
Now that you’ve mastered the art of DIY candle making, your creations will effortlessly turn any space into a warm, enchanting sanctuary. With your newfound skills, your candles will outshine even the most luxurious store-bought alternatives, radiating love and craftsmanship. Keep experimenting with scents and colors, and watch your charming, personalized candles become treasured gifts or stunning decor. Remember, your homemade candles are a tribute to your creativity—brightening lives one flickering flame at a time.