

To create DIY Valentine’s Day wall art, start with heart-shaped string art on a wooden board for a romantic touch, then craft a love notes collage with handwritten messages and photos for a personal feel. Incorporate romantic watercolor prints with soft hues and a heartfelt quote in stylish typography. Add charming Cupid arrow decorations and a photo garland to complete the display. Keep reading to discover fun ideas that turn your space into a love-filled masterpiece.
Key Takeaways
- Create heart-shaped string art on wood for a personalized romantic focal point.
- Assemble and decorate Cupid arrow wall decor using craft materials for whimsical charm.
- Make DIY photo frame heart garlands with photos and string to add a personal touch.
- Design love notes collage or typography art with meaningful quotes for sentimental wall displays.
- Incorporate romantic watercolor prints with thoughtful framing and soft lighting for an elegant effect.
Heart-Shaped String Art
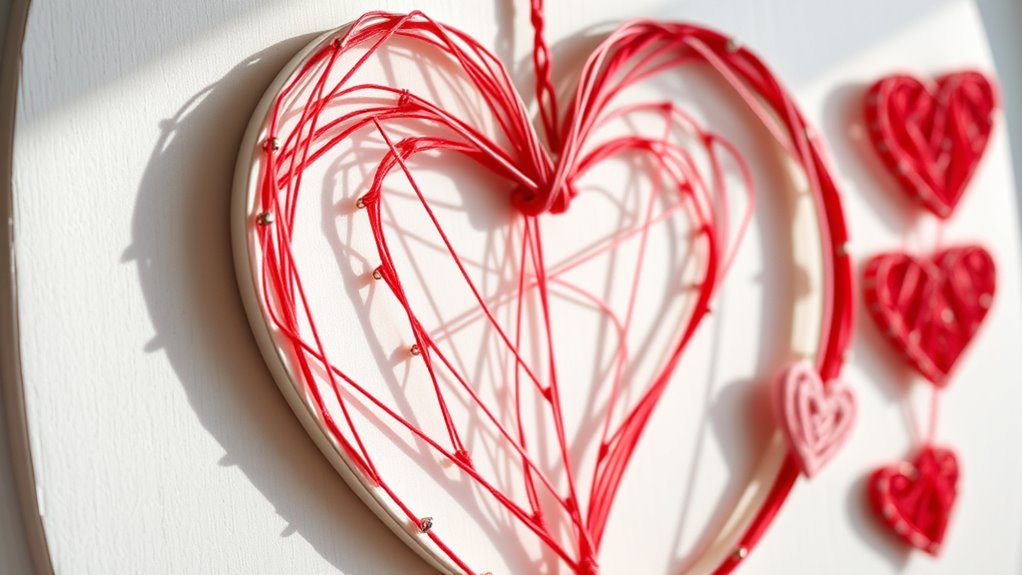
Creating heart-shaped string art is a fun and personalized way to celebrate Valentine’s Day. You start by choosing a sturdy wood board as your base. Draw or print out a heart shape and tape it onto the board. Hammer small nails along the outline, spacing them evenly. Next, select your favorite colored thread or string to make the heart pop. Tie the string to a nail and weave it back and forth across the nails, creating a dense, textured pattern. You can add multiple colors or keep it simple with one hue. Once you fill in the heart shape, tie off the end securely. The result will be a charming, handcrafted piece that beautifully captures your love and creativity. Additionally, paying attention to color accuracy can enhance the visual appeal of your artwork, making the colors more vibrant and eye-catching. Incorporating visual harmony principles can further elevate your design, creating a balanced and appealing piece. Using quality materials ensures that your string art remains durable and attractive over time. Embracing spiritual insights like recognizing angel numbers can also inspire your creative process, adding a meaningful touch to your DIY project.
Love Notes Wall Collage
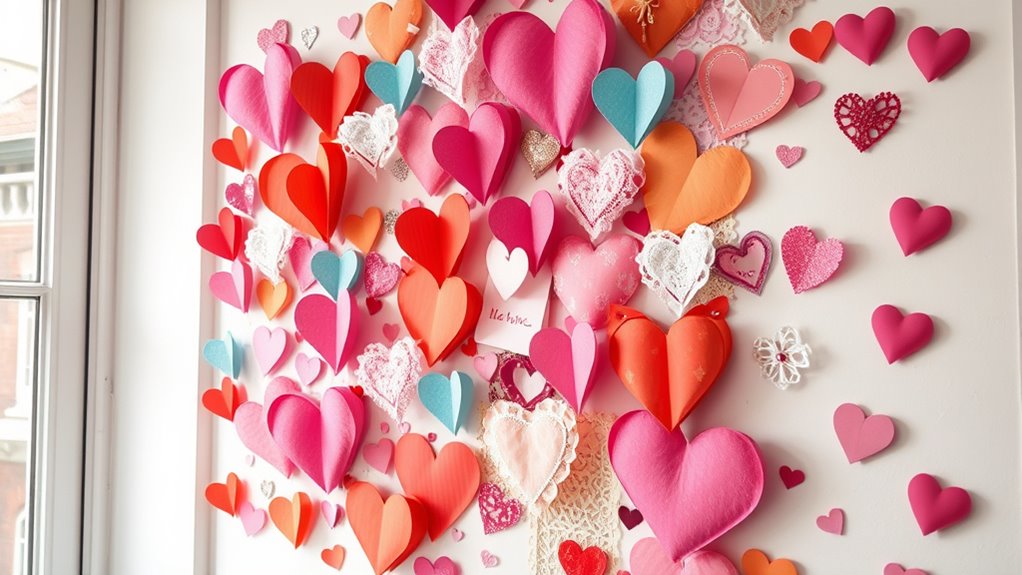
A heartfelt way to showcase your love is by making a Love Notes Wall Collage, which adds a personal and meaningful touch to your Valentine’s Day decor. Start by gathering handwritten notes, love letters, or sweet messages from your partner or loved ones. Use colorful paper or decorative cardstock to make each note stand out. Arrange the notes creatively on a blank wall or framed board, layering or overlapping for visual interest. You can also add photos, small mementos, or decorative elements like hearts or flowers to enhance the display. This DIY project allows you to celebrate your relationship in an intimate way, creating a beautiful, sentimental focal point in your home. Plus, it’s a wonderful activity to do together or to surprise your loved one with. Incorporating personalized decor elements can make the display even more special and unique.
Romantic Watercolor Prints
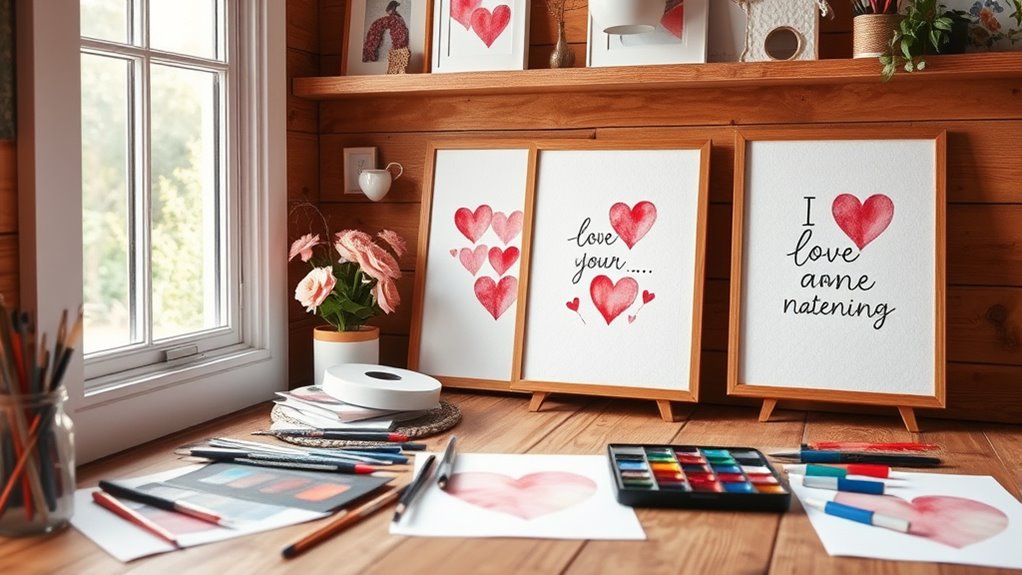
To create stunning romantic watercolor prints, start by choosing a soft, romantic color palette that sets the mood. Experiment with blending colors to craft gentle, dreamy effects that evoke emotion. Once finished, consider framing your artwork thoughtfully to enhance its beauty and display it in a way that catches the eye.
Selecting Romantic Color Palettes
Choosing the right romantic color palette can make your watercolor prints truly stand out. Focus on soft, warm tones like blush pinks, gentle reds, and creamy neutrals to evoke love and intimacy. Incorporate shades of lavender or mauve for a touch of elegance, and consider adding hints of gold or metallic accents for a luxurious feel. Keep in mind that contrasting colors, such as deep burgundy paired with soft pastels, can create visual interest while maintaining a romantic vibe. When selecting your palette, think about the mood you want to convey—passionate, tender, or playful—and choose hues accordingly. Test your colors on scrap paper first to see how they blend and interact, ensuring your watercolor artwork exudes the perfect romantic atmosphere. Understanding color psychology can also help in selecting hues that enhance the romantic mood of your artwork. Additionally, being aware of the impact of sleep and mental health can influence your creativity and focus during the artistic process. Maintaining a healthy mindset can improve your artistic focus and overall satisfaction with your projects.
Crafting Soft Watercolor Effects
Creating soft watercolor effects involves layering gentle washes and allowing colors to bleed naturally, which adds a dreamy, romantic quality to your prints. To achieve this look, start by choosing light, translucent paints and use a wet-on-wet technique. Apply thin washes gradually, letting each layer dry partially before adding the next. This creates subtle color gradations and smooth progressions. Allow the colors to bleed into each other freely, producing natural blends that resemble delicate watercolor paintings. Keep your brushwork light and spontaneous, avoiding harsh lines. For extra softness, you can also sprinkle a little water on the paper or tilt it to encourage gentle spreading. Incorporating natural blending techniques can enhance the romantic, ethereal quality of your prints, making them perfect for Valentine’s Day wall art. Additionally, experimenting with layering textures can add depth and interest to your watercolor projects, helping to mimic the layered color effects typical of professional watercolor paintings. Using high-quality, pure pigments ensures that your colors remain vibrant and true to your vision.
Framing and Display Tips
Once you’ve crafted your soft watercolor Valentine’s Day wall art, presenting it beautifully can make a big difference. Start by choosing a simple frame that complements your artwork’s delicate colors—white, light wood, or metallic frames work well. Guarantee the print is centered and secured with acid-free mats or backing to prevent damage over time. Hang your piece at eye level for maximum impact, ideally above furniture or in a prominent spot. Use painter’s tape or level to keep it straight. To enhance the romantic feel, pair it with soft lighting or string fairy lights nearby. Regularly dust the frame and glass to keep your art looking fresh. Incorporating sound vibrations into your display setup can subtly promote a calming atmosphere. Paying attention to environmental considerations like proper placement and lighting can also help preserve your artwork’s vibrancy. Additionally, choosing the right lighting conditions can significantly enhance the colors and overall presentation of your watercolor print. With thoughtful framing and display, your watercolor print will radiate love and charm.
Cupid Arrow Wall Decor
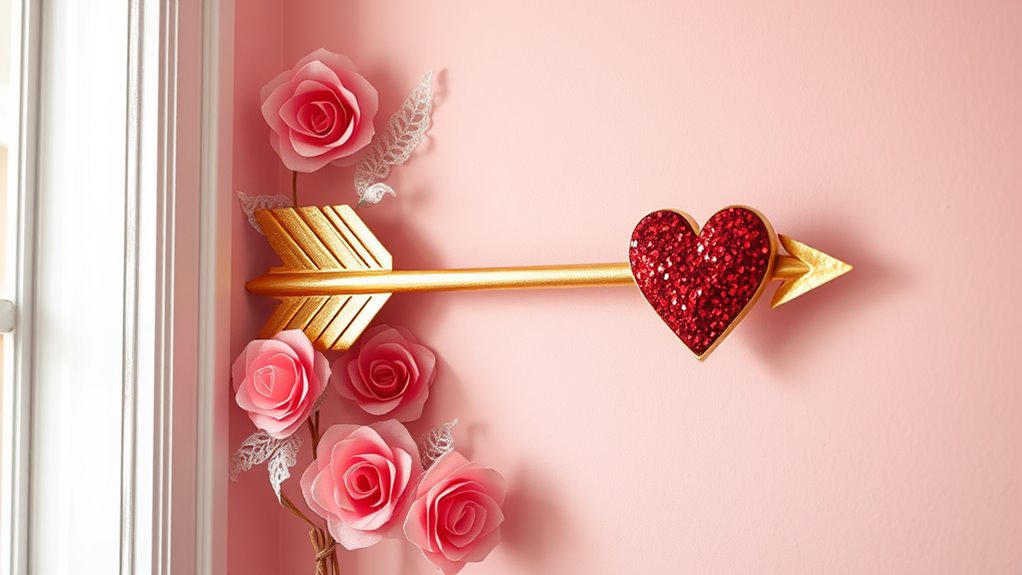
Creating Cupid arrow wall decor is simple when you have the right materials and supplies. Follow a clear step-by-step process to assemble your arrows, then add your own creative touches for a personalized look. With these tips, you’ll craft charming and festive decor that perfectly captures the Valentine’s Day spirit. Incorporating essential oils into your decor, such as using scented accents, can add a delightful aroma to your Valentine’s Day celebration. Be sure to consider privacy policies if you’re sharing your design ideas online or using digital tools to plan your project. Understanding cultural heritage can inspire unique design elements that celebrate love and connection. Additionally, paying attention to drivetrain components can ensure your arrows are sturdy and durable for display. Selecting the right materials can also enhance the overall aesthetic and longevity of your wall art.
Materials and Supplies
To craft your Cupid arrow wall decor, gather a few essential materials. First, choose a wooden dowel or sturdy stick for the arrow shaft. You’ll also need a craft foam sheet or cardboard for the arrowhead, along with decorative paper or painted paper for the fletching. Scissors and glue are necessary for assembly, so have a hot glue gun or craft glue ready. Optional supplies include metallic paint, glitter, or stickers to add extra flair. You might also want twine or ribbon to hang your finished piece. Make sure your workspace is clean and well-lit, and gather all your supplies beforehand to keep the project smooth. Incorporating traditional craft techniques can help you create more detailed and personalized designs for your decor. With these materials on hand, you’ll be set to create a charming Cupid arrow wall decor perfect for Valentine’s Day.
Step-by-Step Assembly
Begin by assembling the main parts of your Cupid arrow. First, attach the arrow shaft to the point, making sure it’s centered and secure. Next, affix the fletching or feathers to the end of the shaft for stability. Finally, attach the heart-shaped tip to the front of the arrow to give it a romantic touch. To do this smoothly, use hot glue or craft adhesive to secure each piece firmly. Hold each part in place for a few seconds to ensure proper bonding. Proper drying time is essential for a durable and professional-looking finish. Allow the entire arrow to dry completely before handling further. When working with adhesives, ensuring proper drying time can improve the durability of your project. Incorporating automation’s role in business intelligence can help you analyze your project process for future improvements. Take your time aligning everything precisely for a polished look. Once assembled, you’ll have a charming Cupid arrow ready to hang and add a playful Valentine’s Day vibe to your wall. Additionally, paying attention to materials used can enhance the overall quality of your decor.
Creative Decoration Tips
Once your Cupid arrow is assembled and dried, it’s time to get creative with how you display it. Hang it on a blank wall for a striking focal point, or create a gallery wall with other love-themed art. You can also prop it against a shelf or mantle for a more casual look. Add small LED fairy lights around the arrow to make it glow at night, creating a cozy, romantic atmosphere. Incorporate heart-shaped accents or floral arrangements nearby to enhance the theme. For a whimsical touch, hang multiple arrows at different heights. Don’t forget to contemplate your room’s color scheme—match or contrast the arrow for visual interest. With these tips, your Cupid arrow will stand out as a charming, personalized Valentine’s Day decoration.
Love Quote Typography Art

Creating love quote typography art for your Valentine’s Day wall is a meaningful way to add a personal touch to your home decor. Start by choosing a quote that resonates with you and your partner. Then, select a font style that matches your mood—bold, script, or minimalist. Finally, follow these steps:
- Write or print your quote using your chosen font and size.
- Transfer the design onto your preferred surface, like canvas or poster board.
- Use paints, markers, or vinyl decals to bring the quote to life.
Keep it simple and focus on clarity. Play with different colors to evoke emotion, and consider layering or framing your artwork for a polished look. This project not only celebrates love but also creates a heartfelt piece for your space.
DIY Photo Frame Heart Garland
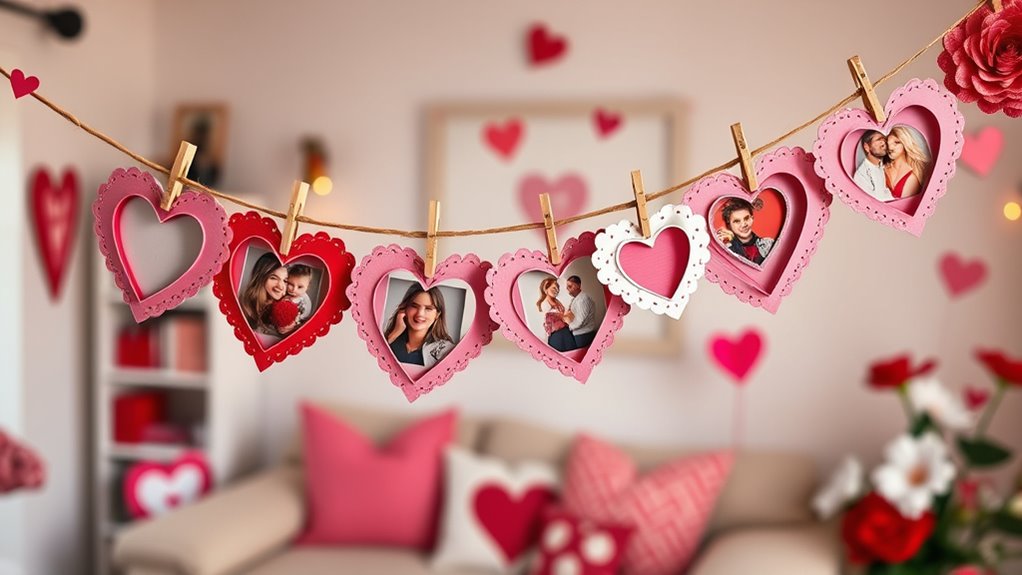
To add a charming, personalized touch to your Valentine’s Day decor, try making a DIY photo frame heart garland. First, gather small photo frames in various shapes and sizes, then cut heart-shaped paper or fabric to fit inside each frame. Insert your favorite photos or love notes into the frames. Use twine or string to connect the frames in a line, securing each with small clothespins or clips. Space the frames evenly for a balanced look. Hang the garland across a mantel, wall, or window to instantly brighten your space. This project is simple, budget-friendly, and customizable, allowing you to showcase your favorite memories and add a heartfelt, romantic vibe to your celebration.
Frequently Asked Questions
What Are Some Budget-Friendly Materials for Valentine’S Day Wall Art?
When you’re looking for budget-friendly materials for Valentine’s Day wall art, you can easily find affordable options. Think about using construction paper, which is inexpensive and comes in many colors. You might also use old magazines or newspapers for collage effects. Washi tape adds a decorative touch without breaking the bank. Additionally, printable templates and free online designs save money while helping you create personalized and festive decorations.
How Can I Customize Wall Art for Different Decorating Styles?
To customize wall art for different decorating styles, you should first identify the style you want to achieve, like modern, rustic, or boho. Then, choose colors, patterns, and materials that match that aesthetic. You can add personal touches like quotes or photos, and adjust the framing or textures accordingly. Experimenting with different elements lets you create unique art pieces that perfectly complement your room’s decor.
Are There Eco-Friendly Options for DIY Valentine’S Decorations?
Imagine stumbling upon eco-friendly Valentine’s Day decorations that not only look charming but also help the planet. You can use reclaimed wood, recycled paper, or even natural materials like dried flowers and herbs to craft your wall art. These options reduce waste and add a unique, rustic touch. Plus, they’re easy to customize to match your style, making your celebration both beautiful and sustainable.
How Long Does DIY Wall Art Typically Last?
When considering how long DIY wall art lasts, it depends on materials and care. You might expect it to stay vibrant for several months if you use quality paints, sealants, or durable materials. Properly hanging and avoiding direct sunlight can extend its lifespan. If you take good care of your creation, it can brighten your space for quite a while, making your effort well worth it.
Can These Projects Be Adapted for Outdoor Display?
You can definitely adapt DIY wall art for outdoor display, but you’ll need to take into account weatherproofing. Use outdoor-safe paints, sealants, and materials like waterproof canvas or treated wood. Make sure your designs are sealed properly to prevent damage from rain, sun, or wind. By choosing the right materials and applying protective coatings, you can enjoy your handmade art outside without worry, creating a charming and personalized outdoor space.
Conclusion
Your wall is now a canvas of love, turning your space into a heartfelt gallery. These DIY projects are like seeds of romance, blooming into beautiful memories and cozy vibes. With a little creativity and effort, you turn simple materials into a masterpiece that speaks your love language. So go ahead, decorate your walls with passion—because your home should be as warm and vibrant as the love you share.